
If you’re building or upgrading your PC, one thing you might hear about is updating your motherboard BIOS. It sounds technical, but don’t worry. In this guide, we’ll walk you through how to upgrade ASUS motherboard BIOS — in plain English, with no confusion, and zero complicated terms.
By the end of this article, you’ll feel confident about upgrading your ASUS BIOS — even if you’ve never done it before.
What is BIOS and Why Is It Important?
Before we jump into the steps, let’s understand what BIOS is.
BIOS stands for Basic Input Output System. It’s the initial program your computer uses to start up and check hardware before loading the operating system. Think of it like your PC’s “starter kit.” It checks all the hardware and tells everything to start working together.
Why Upgrade BIOS?
Upgrading your ASUS motherboard BIOS can:
- Fix bugs or glitches
- Improve performance
- Support new CPUs or RAM
- Add security patches
- Make your PC more stable
However, it’s important to only update your BIOS if you really need to. If your computer is working fine and there’s no specific issue, you can leave it as it is.
Things to Know Before Upgrading
Before you update, here are some must-know tips:
- Backup your data: While BIOS updates usually go smoothly, it’s best to be safe.
- Check your current BIOS version: So you know whether you need to update.
- Make sure your PC won’t shut down: Don’t update BIOS during a power cut or when your battery is low.
- Use the right file: Each motherboard has its own BIOS version. Using the wrong one could harm your PC.
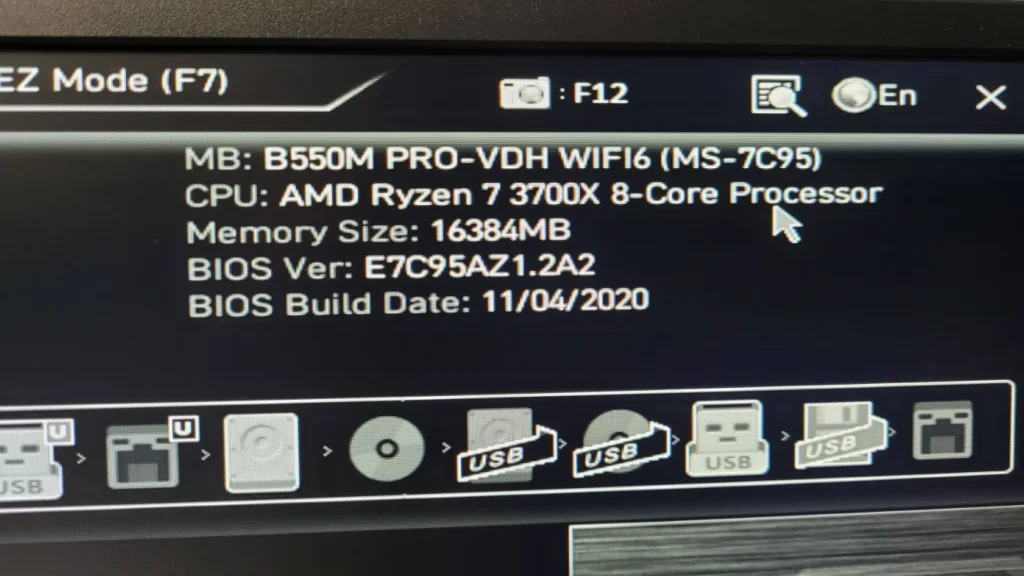
How to Check Your Current BIOS Version
Here’s a quick way to check which BIOS version your ASUS motherboard has:
Method 1: Use System Information
- Press Windows + R on your keyboard.
- Type msinfo32 and press Enter.
- A window will open. Look for BIOS Version/Date.
You’ll see something like:
yaml
CopyEdit
BIOS Version: American Megatrends Inc. 2601, 02/15/2023
This helps you compare with the latest version on the ASUS website.
How to Find Your ASUS Motherboard Model
Before downloading anything, you need your motherboard’s model number.
Method 1: Use CPU-Z (Free Tool)
- Download CPU-Z from CPUID’s official website.
- Open the app.
- Click on the “Mainboard” tab.
You’ll see the exact Model and Manufacturer — something like ASUS TUF B550-PLUS.
Method 2: Check the Box or Manual
If you have the box or motherboard manual, the model number is printed clearly.
Step-by-Step: How to Upgrade ASUS Motherboard BIOS
Now let’s move to the main part — upgrading your ASUS BIOS safely.
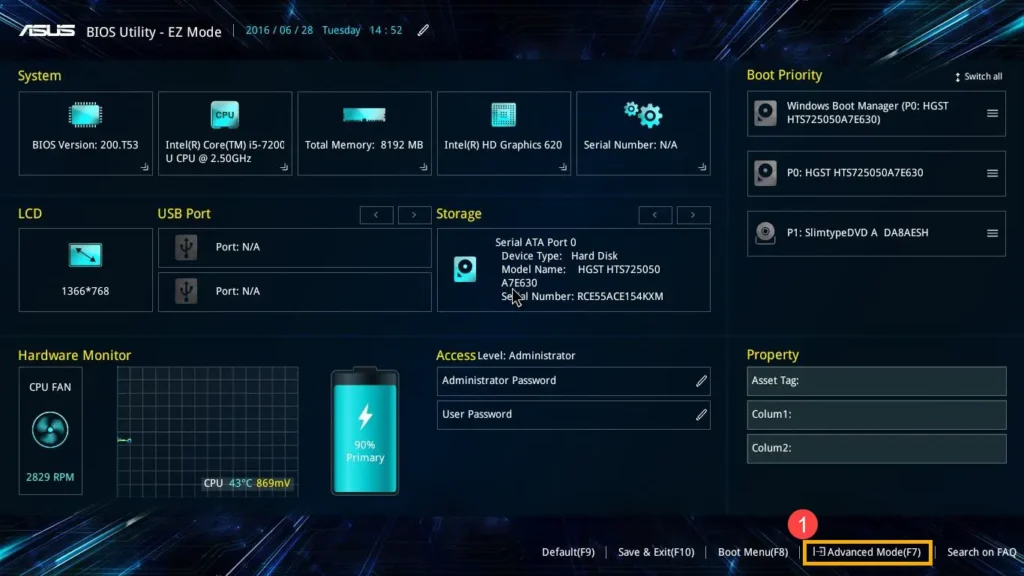
Method 1: Using EZ Flash (Most Recommended)
ASUS includes a built-in tool called EZ Flash in the BIOS menu. It’s safe, reliable, and easy.
Step 1: Download the BIOS Update
- Go to the official ASUS support website: https://www.asus.com/support
- Type your motherboard model in the search bar.
- Select your product from the list.
- Click Support > Driver & Utility > BIOS & Firmware.
- Download the latest BIOS version.
- Unzip the file — you’ll get a file ending with .CAP.
Step 2: Format a USB Drive
- Use a USB stick (4GB or more).
- Format it to FAT32 (right-click > Format > Choose FAT32 > Start).
Step 3: Move the BIOS File
- Copy the .CAP file to the USB drive.
- Plug the USB into your PC.
Step 4: Enter BIOS
- Restart your computer.
- Press Delete or F2 when you see the ASUS logo.
- This opens the BIOS menu.
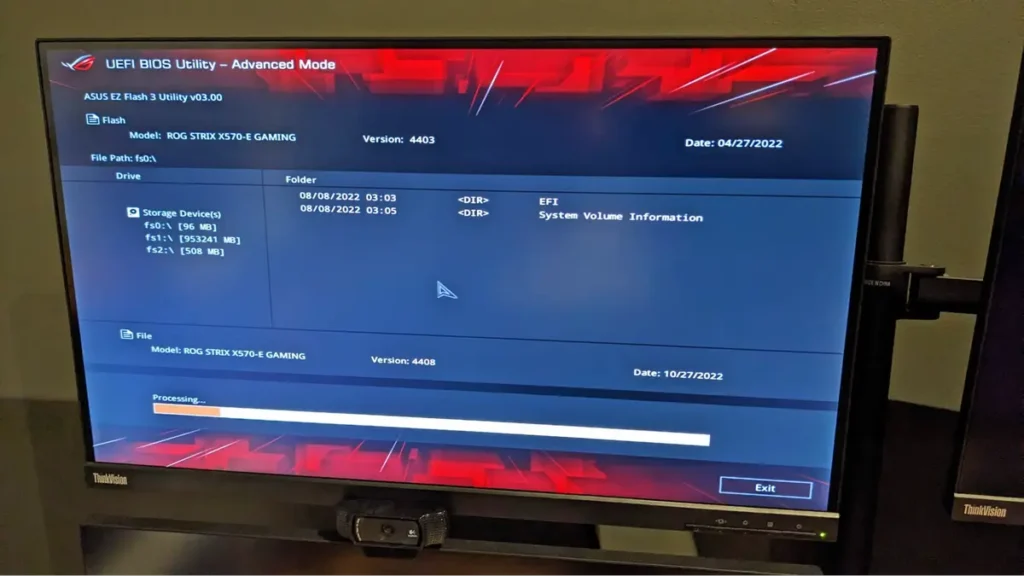
Step 5: Launch EZ Flash
- In the BIOS menu, go to Tool > ASUS EZ Flash 3 Utility.
- Select your USB drive.
- Choose the .CAP BIOS file.
- Click Yes to confirm.
Your system will now update the BIOS. Don’t turn off the power during this time.
When it’s done, your PC will restart automatically.
Method 2: Using ASUS BIOS Flashback (No CPU Needed)
This method is great if your system isn’t booting or you’re upgrading to a new CPU.
Note: This only works if your motherboard has the BIOS Flashback button (check your manual or look for a labeled button on the board).
Steps:
- Format USB to FAT32 and rename the BIOS file as required (ASUS gives you the rename tool or file name on their site).
- Plug the USB into the BIOS Flashback USB port (marked on the rear I/O).
- Press the BIOS Flashback button for a few seconds.
- The light will blink. When it stops blinking, the update is done.
You don’t need a CPU, RAM, or display connected for this to work.
Method 3: Use MyASUS (Windows Tool)
ASUS provides a software tool for Windows users called MyASUS.
Steps:
- Download and install MyASUS from the Microsoft Store.
- Open the app and go to Customer Support > LiveUpdate.
- It will scan for BIOS updates.
- If available, click Update.
Your PC will restart and upgrade the BIOS.
Note: Some people prefer using EZ Flash because Windows tools can be interrupted by background processes.
What to Do After BIOS Update
After the update, your PC might restart a few times.
Here’s what you should do next:
- Enter BIOS and load optimized defaults (this resets BIOS settings to safe values).
- Re-enable settings you had earlier (like XMP for RAM, fan curves, boot order).
- Save changes and restart.
Everything should now run smoothly.
Troubleshooting BIOS Update Problems
While rare, issues can happen. Here’s how to fix them:
Problem 1: PC won’t boot
- Reset the CMOS (use the jumper or remove the battery for 10 minutes).
- Try BIOS Flashback if supported.
Problem 2: Stuck on black screen
- Wait at least 10 minutes before doing anything.
- If no display, try clearing CMOS and reapplying the BIOS update.
Problem 3: USB not detected in EZ Flash
- Make sure it’s FAT32 and plugged into a USB 2.0 port.
- Reformat and try again.
Tips to Keep Your BIOS Safe and Healthy
- Only update BIOS when necessary.
- Always download from the official ASUS website.
- Don’t turn off power while updating.
- Avoid using a laptop battery alone — plug into a wall socket.
- Label your USB BIOS drive for future use.
How Often Should You Update Your ASUS BIOS?
Updating your BIOS isn’t something you do every week. In fact, most users only need to update it when adding new hardware, like a new CPU, or when ASUS releases a fix for a known issue. It’s a “when needed” task — not a regular one. Check the ASUS support page every few months to see if there’s a BIOS version that addresses something specific to your system. Otherwise, it’s safe to stick with your current version.
Can a BIOS Update Fix Compatibility with New Graphics Cards?
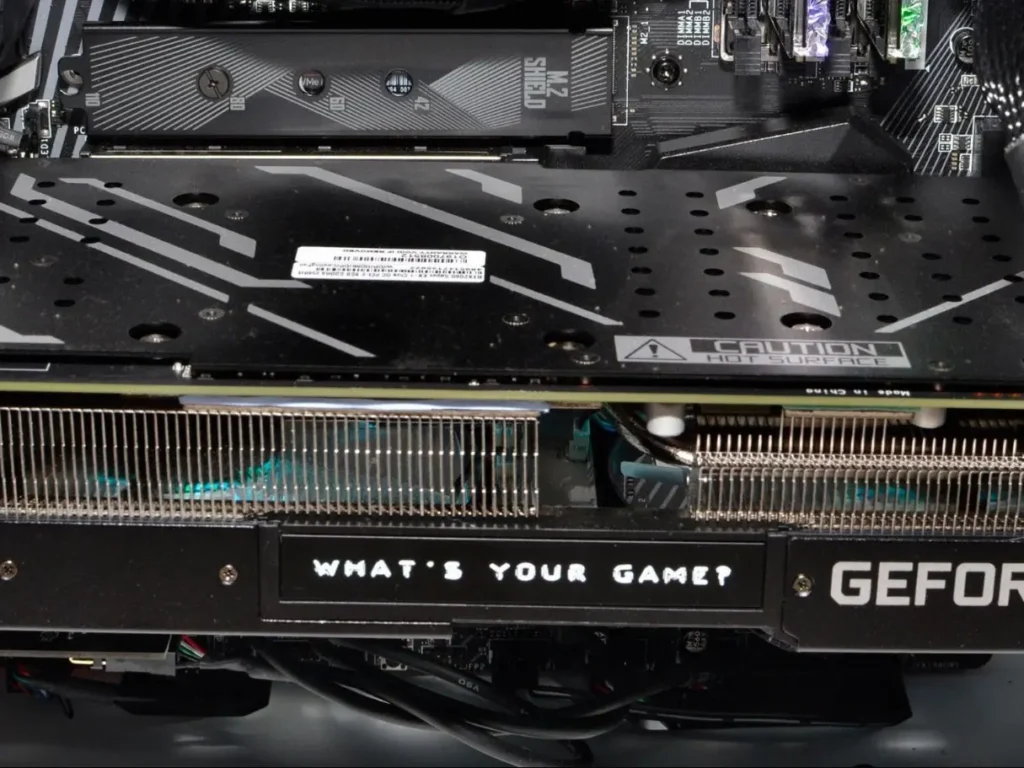
Yes, sometimes a BIOS update can help your ASUS motherboard support newer GPUs, especially if you’re upgrading to a next-gen NVIDIA or AMD graphics card. If you’re facing issues like no display, boot loops, or random restarts after installing a new GPU, a BIOS update might resolve them. Always check ASUS’s release notes to confirm if GPU compatibility has been improved.
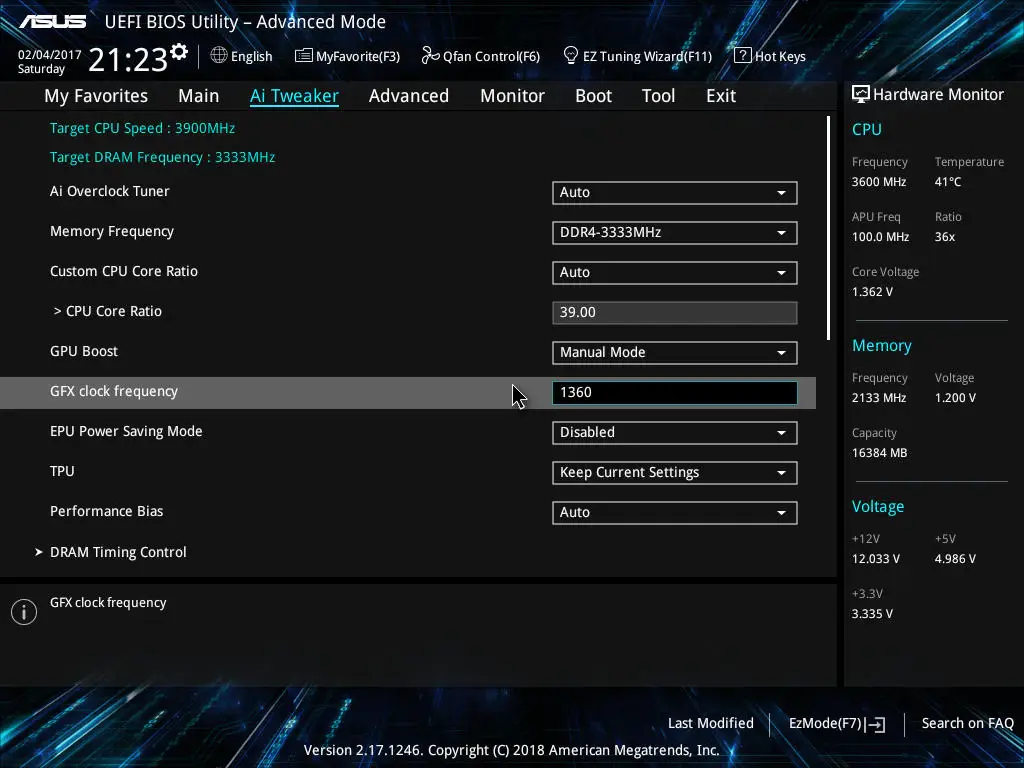
Does Updating BIOS Affect Your Overclock or XMP Settings?
After a BIOS update, your overclock profiles and XMP (Extreme Memory Profile) settings may reset to default. This is normal and not a sign of failure. Always re-enable these settings manually after the update. It’s also a good idea to take screenshots of your BIOS settings before updating — that way, you can easily restore your custom setup afterward.
Is the Internet Required to Update ASUS BIOS?
You don’t need an internet connection to update the BIOS using EZ Flash or BIOS Flashback. All you need is a formatted USB drive with the BIOS file downloaded from the ASUS website. However, the MyASUS tool, which updates BIOS through Windows, does require internet access. For offline safety and reliability, USB-based methods are best.
What Happens If You Install the Wrong BIOS File?
Installing the wrong BIOS file can cause serious issues — your system might not boot or respond at all. Always double-check the exact model name of your motherboard before downloading the BIOS. ASUS motherboards have similar names, so it’s easy to make a mistake. Use tools like CPU-Z or check the physical board itself for the correct model number.
Final Thoughts – Is Updating BIOS Worth It?
If you want to install a new processor, fix some bugs, or improve compatibility, updating your ASUS BIOS is worth it.
But if your PC is running smoothly and there’s no specific reason to update — it’s okay to leave it as is.
ASUS makes BIOS updating easy with tools like EZ Flash and BIOS Flashback. As long as you follow the steps and use the correct files, the process is safe.
Quick FAQ – ASUS BIOS Update
Is it risky to update BIOS?
It’s safe if done correctly. Just don’t interrupt the power.
Do I need to update BIOS for a new CPU?
Sometimes, yes. New CPUs may not work on old BIOS versions.
Can I downgrade BIOS later?
Some ASUS boards allow it, but it’s better to check the support page first.
How long does it take?
Usually 2–5 minutes. BIOS Flashback may take a bit longer.
Will it delete my data?
No, it only affects the motherboard firmware — your files stay safe.
Conclusion
Upgrading your ASUS motherboard BIOS doesn’t need to be scary or complicated. Whether you use EZ Flash, MyASUS, or BIOS Flashback, ASUS gives you multiple safe and simple ways to keep your BIOS up to date.
Always follow the steps carefully, double-check your motherboard model, and use official downloads.
With this guide, you’re now ready to handle your ASUS BIOS upgrade like a pro — even if it’s your very first time!
Leave a Reply