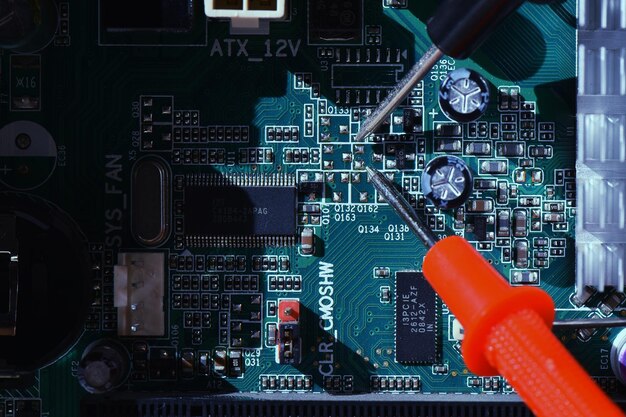
When I changed my PC’s motherboard, I was surprised to see that my Windows edition had also changed. I didn’t expect it at all! If this happens to you, don’t worry, it’s more common than you think. It happened to me, and it can be fixed.
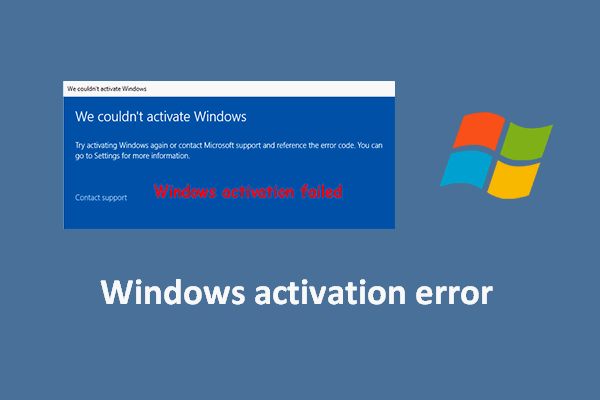
If you changed your motherboard and Windows changed editions, it’s likely due to licensing issues. Windows sometimes reverts to a different edition when hardware changes occur. You may need to reactivate Windows or update your product key to fix the issue.
In this article, we will discuss why changing your motherboard can cause Windows to switch editions, the reasons behind this issue, and how you can easily fix it. We’ll also explore ways to prevent this from happening during future upgrades.
Windows Licensing and Activation
Windows uses a digital license system to verify that your copy of the operating system is genuine. When you upgrade your motherboard, this digital license can become invalid. There are two types of licenses to consider: OEM and Retail. OEM licenses are tied to the original hardware, and once you swap out your motherboard, the license can no longer activate automatically. Retail licenses, on the other hand, can be transferred between different machines, allowing you to reactivate Windows more easily after a hardware upgrade.
What Happens When You Change Your Motherboard?
Changing your motherboard will often lead to a deactivated copy of Windows. In some cases, your edition may switch to a lower or different version, leaving you puzzled as to what happened. Windows does this because it’s built to detect major hardware changes and assumes you’ve installed the operating system on a new device.
Steps to Reactivate Windows After a Motherboard Change
If you’ve linked your Windows license to your Microsoft account, reactivating it after a motherboard change is simple. Follow these steps:
- Sign in to your Microsoft account linked to the license.
- Go to Settings > Update & Security > Activation.
- Click on Troubleshoot, and select I changed hardware on this device recently.
- Follow the on-screen instructions to reactivate Windows.
If your license isn’t linked to a Microsoft account, you’ll need your product key to reactivate it manually.
Fixing the Edition Change Issue
If Windows changed your edition after the motherboard upgrade, here’s how you can restore your previous version:
- Go to Settings > Update & Security > Activation.
- Enter your original product key (if available).
- If the issue persists, contact Microsoft support for assistance with reactivating the correct edition.
Preventing Edition Changes in the Future
To avoid Windows changing editions after a motherboard upgrade, ensure your Windows license is transferable. This is especially important if you plan to make future hardware changes. Consider using a retail license, which offers more flexibility compared to an OEM license.
The Importance of Backup and Preparation
Before upgrading any hardware, especially the motherboard, it’s crucial to back up your important data. Prepare for potential issues with your operating system by ensuring you have your product key or that your license is linked to your Microsoft account. This will help prevent any surprises, like Windows changing editions.
Common Errors When Reactivating Windows
During reactivation, you may encounter some errors. Common problems include mismatches between the edition and product key or the system failing to recognize your hardware. These issues can usually be resolved by troubleshooting or contacting Microsoft support.
How OEM and Retail Licenses Differ in Motherboard Upgrades
OEM licenses are tied directly to your original hardware, meaning they won’t transfer easily if you upgrade your motherboard. Retail licenses, however, allow you to change hardware and reactivate Windows without much hassle.
What Happens if Windows Doesn’t Reactivate?
If you can’t reactivate Windows after changing your motherboard, you may need to contact Microsoft for help. They can verify your product key and help you switch back to the correct edition if needed.
How to Upgrade Without Changing Editions
To prevent Windows from changing editions, ensure that your license is prepared for a hardware upgrade. Using a retail license, for example, allows you to change your motherboard without forcing an edition change.
Why It’s Important to Keep Windows Updated
Keeping your Windows operating system up-to-date ensures smooth compatibility with new hardware, such as a motherboard upgrade. Regular updates help avoid problems with activation and edition changes.
Do You Always Need to Change the Edition?
In some cases, Windows may switch to a different edition after a motherboard change, but it’s not always necessary to revert back. If your current edition meets your needs, you may not need to change it at all.
Prepare your Windows 11 device for a hardware change?
To prepare for a hardware change on Windows 11:
- Back up data.
- Link your Microsoft account for easy reactivation.
- Deactivate your license if needed.
- Create a restore point.
- Download new hardware drivers beforehand.
Link your Windows 11 digital license to your Microsoft account?
To link your Windows 11 digital license to your Microsoft account:
- Go to Settings > Accounts > Your Info.
- Sign in with your Microsoft account.
- Ensure “Windows is activated with a digital license” message appears under Settings > System > Activation.
This makes reactivation easier after hardware changes.
Confirm your Windows 11 edition?
To confirm your Windows 11 edition, follow these steps:
- Press Windows key + I to open Settings.
- Go to System and then select About.
- Under the Windows Specifications section, you’ll see your Windows edition listed.
Reactivate Windows 11 after a hardware change?
To reactivate Windows 11 after a hardware change:
- Go to Settings > System > Activation.
- Click Troubleshoot under “Activation state.”
- I recently updated the hardware on this device.
- Sign in to your Microsoft account linked to your digital license.
- Choose your device from the list and click Activate.
If you have a digital license, run the Activation troubleshooter?
To run the Activation Troubleshooter if you have a digital license:
- Go to Settings > System > Activation.
- Under “Activation state,” click Troubleshoot if your Windows isn’t activated.
- Follow the on-screen prompts, and select I changed hardware on this device recently if applicable.
- Sign in to your Microsoft account and select your device from the list.
If you don’t have a digital license or product key?
If you don’t have a digital license or product key, you’ll need to purchase one to activate Windows 11:
- Go to Settings > System > Activation.
- Click Go to Microsoft Store and follow the steps to buy a valid license.
- Once purchased, Windows will activate automatically.
Prepare your Windows 10 device for a hardware change?
Here’s how to get your Windows 10 device ready for a hardware upgrade:
- Back Up Your Data: Save important files to external storage or the cloud.
- Link Your Microsoft Account: Go to Settings > Accounts > Your info, and ensure you’re signed in with a Microsoft account.
- Deactivate License (if necessary): Use slmgr.vbs /upk in Command Prompt to uninstall your product key.
- Create a Restore Point: Go to Settings > System > About > System Protection and create a restore point.
- Download Drivers: Get drivers for new hardware, like your motherboard or GPU.
- Check Compatibility: Ensure the new hardware is compatible with Windows 10.
Link your Windows 10 digital license to your Microsoft account?
To connect your Windows 10 digital license to your Microsoft account:
- Go to Settings > Accounts > Your info.
- Log in with your Microsoft account if you haven’t done so yet.
- Ensure the message “Windows is activated with a digital license linked to your Microsoft account” appears under Settings > Update & Security > Activation.
Confirm your Windows 10 edition?
To confirm your Windows 10 edition:
- Go to Settings > System > About.
- Scroll down to the “Windows Specifications” section.
- Look for your Edition (e.g., Windows 10 Home, Windows 10 Pro).
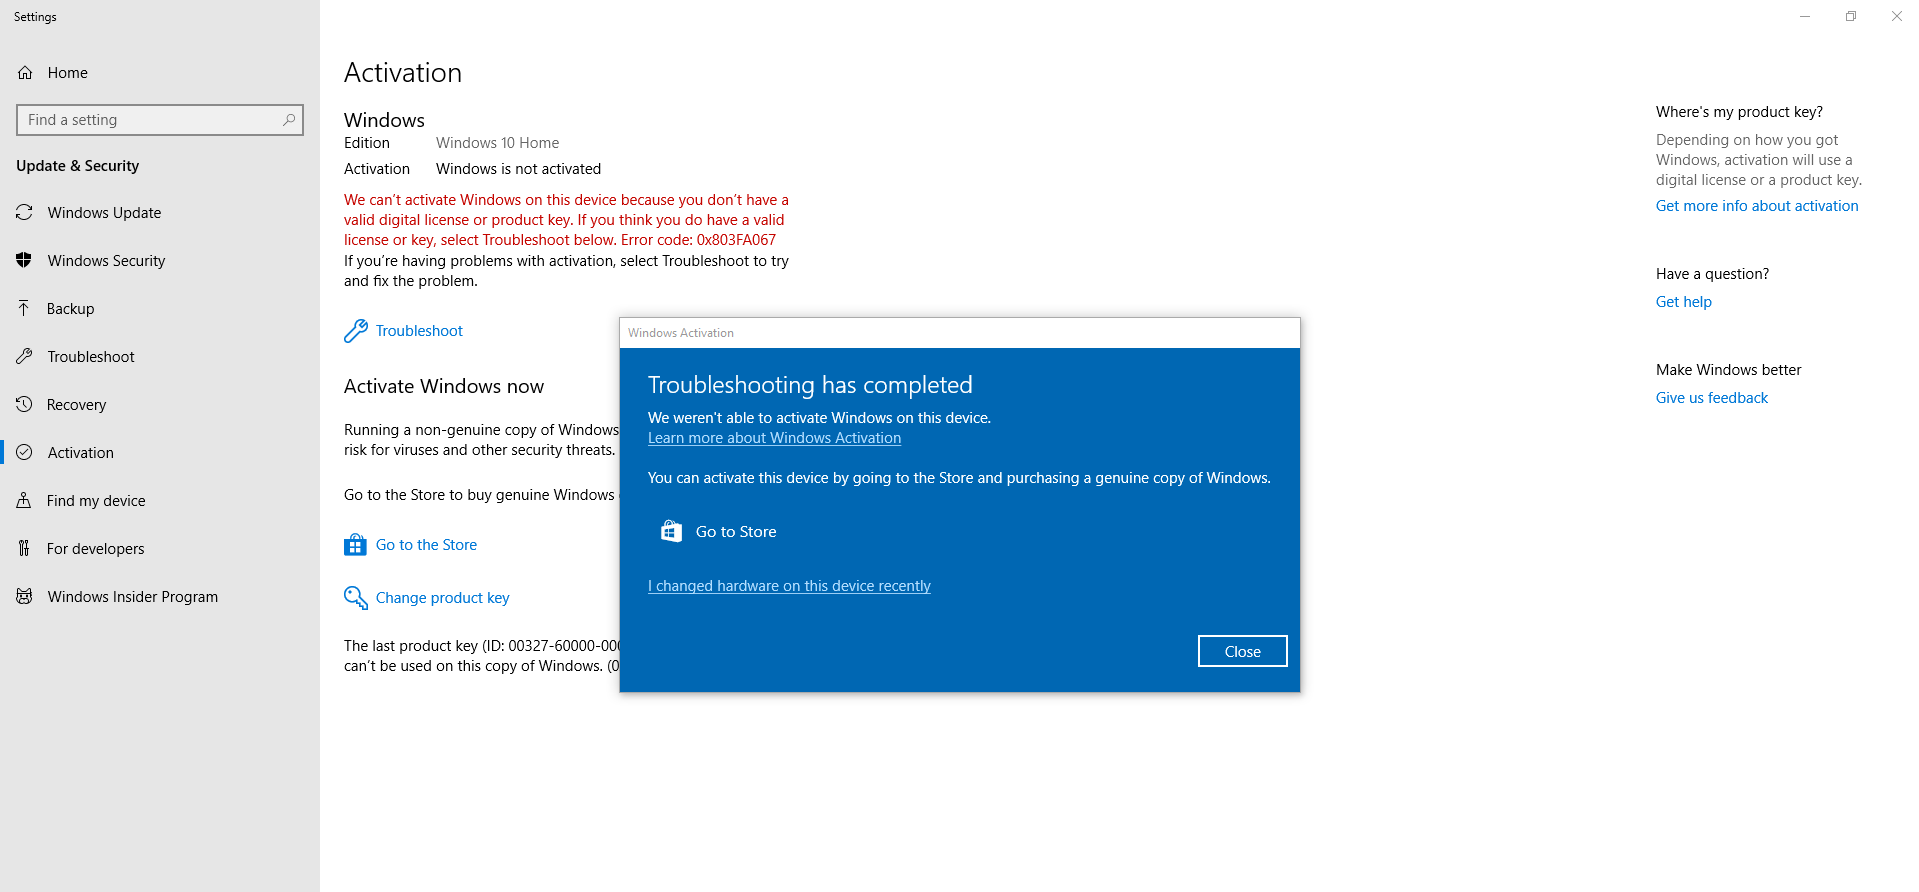
Cannot Activate Windows After Motherboard Change
If you cannot activate Windows after a motherboard change, follow these steps:
- Run Activation Troubleshooter:
- Go to Settings > Update & Security > Activation.
- Click Troubleshoot and follow the prompts.
- Select “I Changed Hardware on This Device Recently”:
- If you have a linked digital license, select this option and sign in to your Microsoft account.
- Choose Your Device:
- Select your device from the list and click Activate.
- Enter Product Key:
- If you have a product key, go to Settings > Activation and click Change product key to enter it manually.
If I change my motherboard and processor, can I still run my original version of Windows with all my programs still installed?
Yes, you can still run your original version of Windows after changing your motherboard and processor, but there are a few things to consider:
- Activation: You may need to reactivate Windows. Use the Activation Troubleshooter in Settings if you have a digital license linked to your Microsoft account.
- Drivers: Install new drivers for your new motherboard and processor to ensure compatibility and performance.
- Programs: Most programs should remain installed and functional, but some might require reinstallation or reactivation due to hardware changes.
- Backup: Always back up important data before making hardware changes to avoid potential data loss.
Unable to activate Windows after changing motherboard and CPU ?
If you’re unable to activate Windows after changing your motherboard and CPU, try these steps:
- Run the Activation Troubleshooter:
- Go to Settings > Update & Security > Activation.
- Click Troubleshoot and follow the instructions.
- Reactivate Using a Microsoft Account:
- If your digital license is linked to your Microsoft account, select I changed hardware on this device recently during troubleshooting.
- Sign in with your Microsoft account and choose your device from the list.
- Enter Product Key:
- If you have a product key, go to Settings > Activation and click Change product key to enter it.
- Contact Microsoft Support:
- If you continue to have activation problems, reach out to Microsoft Support for help.
How to check activation before hardware change on Windows 10
To check your Windows 10 activation status before a hardware change:
- Open Settings: Click the Start menu and select Settings (gear icon).
- Go to Update & Security: Click Update & Security.
- Select Activation: Click Activation in the sidebar.
Here, you’ll see your activation status, such as “Windows is activated with a digital license” or “Windows is activated with a product key.” Make sure your Windows license is linked to your Microsoft account for easier reactivation after the hardware change.
FAQs
Why does Windows change editions after a motherboard upgrade?
Windows identifies hardware changes like a new motherboard, which can lead to re-evaluating the system license, sometimes causing an edition switch.
Can I prevent Windows from changing editions when I upgrade my motherboard?
Yes, by using a transferable retail license linked to your Microsoft account, you can prevent edition changes.
What is the difference between an OEM and a retail Windows license?
An OEM license is tied to your original hardware, while a retail license allows reactivation after hardware upgrades like changing the motherboard.
How do I fix my Windows edition after a motherboard change?
You can re-enter your original product key or use the Troubleshoot option in Windows to restore your original edition.
What should I do if Windows doesn’t reactivate after a motherboard upgrade?
If reactivation fails, contact Microsoft support for assistance in verifying your license and restoring the correct edition.
Do I need a new operating system if I change my motherboard?
Generally, you don’t need a new operating system if you change your motherboard. However, you might need to:
- Reactivate Windows: You may need to reactivate Windows, especially if the motherboard change affects your hardware ID. Use the Activation Troubleshooter if you have a digital license linked to your Microsoft account.
- Update Drivers: Install new drivers for the new motherboard to ensure compatibility and performance.
- Ensure Compatibility: Verify that your existing OS version is compatible with the new motherboard’s chipset and features.
Do I need a new copy of Windows if I get a new motherboard?
No, you generally do not need a new copy of Windows if you get a new motherboard. However, you might need to:
- Reactivate Windows: You may need to reactivate your Windows license, especially if the motherboard change affects your hardware ID. Use the Activation Troubleshooter and sign in with your Microsoft account if your license is linked.
- Update Drivers: Install the necessary drivers for the new motherboard.
Does changing your motherboard reset your PC?
Changing your motherboard does not inherently reset your PC, but it can lead to some issues:
- Windows Activation: You may need to reactivate Windows, but this doesn’t involve a reset.
- Driver Issues: You might need to reinstall or update drivers for the new motherboard.
- System Settings: Some BIOS settings and hardware configurations might need adjustment.
Is Windows license tied to motherboard?
Yes, Windows licenses are often tied to the motherboard. Here’s how it works:
- Digital License: Windows 10 and 11 digital licenses are linked to the motherboard’s hardware ID. Changing the motherboard may require reactivation.
- Product Key: If you have a product key, it’s usually not tied to a specific motherboard, but a significant hardware change might still necessitate reactivation.
Reactivate Windows after motherboard change
To reactivate Windows after a motherboard change:
- Open Activation Settings: Go to Settings > Update & Security > Activation.
- Run the Activation Troubleshooter: Click Troubleshoot if you see activation issues.
- Select “I changed hardware on this device recently”: Follow the prompts to sign in with your Microsoft account linked to your digital license.
- Choose Your Device: Select your device from the list and click Activate
Will I lose my Windows license if I change motherboard?
You shouldn’t lose your Windows license if you change your motherboard, but you may need to reactivate it. If your license is a digital license linked to your Microsoft account, you can use the Activation Troubleshooter to reactivate Windows after the hardware change. If you have a product key, you can enter it to reactivate.
Is Windows license key stored in BIOS?
For Windows 8 and later, including Windows 10 and 11, the license key (for OEM versions) is often stored in the BIOS or UEFI firmware. This is known as a “BIOS-embedded key.”
For retail versions, the key is not stored in the BIOS; you’ll need to enter it manually if you reinstall or change hardware.
Is Windows license key lifetime?
A Windows license key can be considered lifetime under certain conditions:
- OEM License: Tied to the original hardware (e.g., motherboard) and typically not transferable to a new PC. It remains valid as long as the original hardware remains in use.
- Retail License: More flexible, allowing transfer to a new PC, but usually only one active installation at a time. It remains valid for as long as you keep using it on one machine.
How to remove OEM key from BIOS?
To remove an OEM key from the BIOS, follow these steps:
- Access BIOS/UEFI: Restart your computer and enter BIOS/UEFI settings (usually by pressing F2, Del, or Esc during startup).
- Locate the Key: Some BIOS setups have a section for viewing or editing product keys, but this can vary by manufacturer.
- Clear the Key: There is no standard option to directly remove or delete the key from BIOS/UEFI. However, if you install a different version of Windows or perform a clean install, the OEM key will typically no longer be used.
- Reinstall Windows: Performing a clean installation of Windows might overwrite or bypass the OEM key in BIOS.
- Contact Manufacturer Support: For specific instructions or if you need to handle the key more directly, consult the manufacturer’s support.
How to check Windows version in BIOS?
You typically can’t check the Windows version directly in the BIOS/UEFI, as BIOS/UEFI only manages hardware settings and doesn’t provide details about the operating system.
To check your Windows version, follow these steps:
- Open Settings: Press Win + I to open the Settings app.
- Go to System > About: This section displays your Windows version and build.
For hardware-specific details like BIOS/UEFI version:
- Open System Information: Press Win + R, type msinfo32, and press Enter.
- Check BIOS Version: Look for the “BIOS Version/Date” entry
Conclusion
Upgrading your motherboard is a significant change that can lead to unexpected Windows edition switches. Understanding how Windows licenses work, and how to reactivate and restore your original edition, can save you time and stress. By preparing ahead, you can avoid most of these issues and enjoy a smoother upgrade process.
Leave a Reply