
When the DRAM light on my motherboard came on, I felt stuck. It usually means there’s an issue with the RAM—maybe it’s not properly installed or not compatible. But don’t worry! I’ll explain what this light means and how you can fix it step-by-step.
The DRAM light on a motherboard signals a RAM-related issue, like improper installation or compatibility problems. Check if the RAM is securely seated and compatible with your motherboard. Updating the BIOS may also help resolve the issue.
In this article, we will discuss what the DRAM light on a motherboard means, common causes behind it, and practical solutions to fix RAM-related issues. Whether it’s a loose connection, compatibility trouble, or a BIOS update, we’ll walk you through steps to get your system running smoothly again.
Importance of Understanding Motherboard Indicators
These indicator lights offer a simple way to troubleshoot problems like boot failures. Knowing what each light means can save you time and prevent headaches while setting up or upgrading your PC.
What Does the DRAM Light Mean on a Motherboard?
The DRAM light specifically points to problems related to memory modules. When it lights up, your computer might fail to boot or enter the BIOS, alerting you to check the RAM.
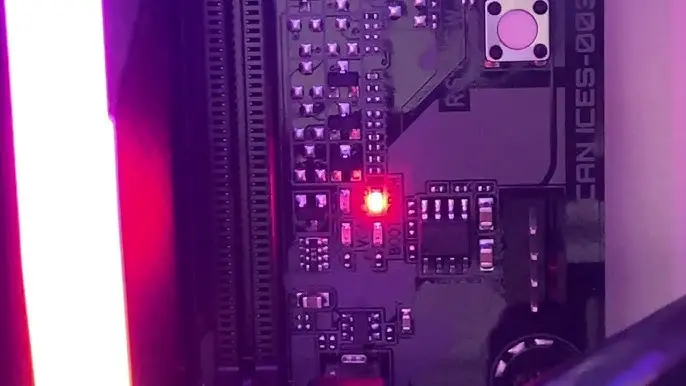
Most modern motherboards come with indicator lights (often called Q-LEDs) in colors like red, yellow, or green. The DRAM light is usually red or orange.
Causes of DRAM Light on a Motherboard
Improper RAM Installation
Incorrectly seated RAM sticks are one of the most common causes. If the module isn’t securely in place, the motherboard won’t detect it properly.
Incompatible RAM Modules
Not all RAM is compatible with every motherboard. Mismatched speeds or memory types (like DDR3 on a DDR4 board) can cause the DRAM light to activate.
Faulty or Damaged RAM Sticks
If one or more RAM sticks are defective, the system will struggle to boot, triggering the DRAM light.
BIOS Configuration Issues
Incorrect BIOS settings—such as mismatched memory frequencies—can lead to boot problems. In such cases, the DRAM light serves as a signal.
Power Supply Problems
An unstable or insufficient power supply can also prevent the RAM from functioning properly, leading to a glowing DRAM indicator.
How to Troubleshoot the DRAM Light Issue
Step 1: Reseat the RAM Modules
Shut down your PC and remove the RAM sticks. Carefully reinstall them, making sure they snap securely into place.
Step 2: Check for RAM Compatibility
Confirm that the RAM is compatible with your motherboard model by reviewing the QVL (Qualified Vendor List) provided by the manufacturer.
Step 3: Test with One RAM Stick at a Time
If you have multiple RAM sticks, try booting the system with just one. This helps identify if one of the modules is faulty.
Step 4: Update BIOS Settings
Enter the BIOS and ensure the memory settings are correctly configured. If needed, reset to default settings to eliminate configuration errors.
Step 5: Reset CMOS Battery
Take out the CMOS battery for a few minutes to reset the BIOS settings. This often resolves memory-related startup issues.
Advanced Troubleshooting Techniques
Verify Motherboard and RAM Compatibility List
Some motherboards are finicky with memory brands. Check the official compatibility list for guaranteed results.
Test with Different Power Supply Unit (PSU)
Try using a known-good PSU to rule out power issues affecting your RAM.
Inspect the Motherboard for Physical Damage
Look for signs of bent pins, blown capacitors, or other damage that could interfere with RAM detection.
Preventing DRAM Light Issues in the Future
Use Recommended RAM Models
Always purchase RAM from reputable brands listed on the motherboard’s QVL.
Keep BIOS Updated Regularly
Periodic BIOS updates help maintain compatibility with newer memory modules and system components.
Ensure Proper Installation Procedures
Take care during installation to seat RAM modules correctly and avoid physical damage to the board.
DRAM light is a constant red on motherboard, cannot get display or BIOS
A constant red DRAM light on your motherboard usually indicates a memory (RAM) issue. Here’s how you can troubleshoot it:
- Power off and unplug the PC.
- Check RAM seating: Reseat the RAM sticks by removing them and reinstalling to ensure they’re properly seated.
- Try one stick at a time: If you have multiple RAM sticks, try using just one in different slots to isolate a faulty stick or slot.
- Clear CMOS: Reset the BIOS by removing the CMOS battery for a few minutes or using the motherboard’s reset button.
- Check compatibility: Ensure the RAM is compatible with your motherboard.
Motherboard DRAM LED keeps lighting up
If the DRAM LED on your motherboard keeps lighting up, it indicates persistent memory-related issues. Here are additional troubleshooting steps you can try:
- Test Different RAM: If possible, try using a different set of RAM sticks that are known to work.
- Update BIOS: If you can eventually boot, check for a BIOS update from the motherboard manufacturer. Some updates improve RAM compatibility.
- Inspect for Damage: Check the RAM slots and motherboard for any visible damage or bent pins.
- Power Supply Issues: Make sure your power supply is working properly and delivering the correct voltage, as insufficient power can cause this issue.
- Check CPU Seating: An improperly seated CPU or bent pins can sometimes cause memory detection issues.
If none of these help, you might need to consider that either the motherboard or RAM is faulty and may need to be replaced.
PC won’t post, red DRAM light
If your PC won’t post and the red DRAM light stays on, here are steps to diagnose and fix the problem:
- Reseat the RAM: Turn off the PC, unplug it, and remove the RAM sticks. Reinstall them securely in their slots.
- Try One Stick: If you have multiple RAM sticks, try booting with just one stick in different slots to identify a bad stick or slot.
- Clear CMOS: Reset your BIOS by removing the CMOS battery for a few minutes or using the clear CMOS button/jumper on the motherboard.
- Use Different RAM: If you have access to other compatible RAM sticks, try swapping them to rule out faulty memory.
- Check CPU and Power Connections: Ensure your CPU and power connections are securely connected. Sometimes, a loose CPU or insufficient power can cause memory issues.
- Update BIOS: If you’re able to boot up after troubleshooting, check for any available BIOS updates that might resolve memory compatibility issues.
If the issue persists, you might be dealing with defective RAM or motherboard.
Debug LEDs on Motherboards
Debug LEDs on motherboards are diagnostic lights that help identify hardware problems during the boot process. These LEDs are usually labeled for specific components and can light up in different colors depending on the motherboard model. Here’s a breakdown of common debug LED indicators:
- CPU: A lit CPU LED means there’s an issue with the processor or its connection to the motherboard.
- DRAM: If the DRAM LED is on, it indicates a problem with the memory (RAM), such as improper installation or faulty RAM sticks.
- VGA/GPU: This LED lights up when there’s an issue with the graphics card, such as a bad connection or faulty GPU.
- Boot: A boot LED points to a problem with boot devices like the hard drive or SSD, often indicating the system can’t find a bootable drive.
These LEDs are particularly useful in diagnosing why a system won’t boot or post, helping you quickly focus on the problematic component.
How to Fix DRAM LED on Motherboard?
If the DRAM LED on your motherboard is lit, it indicates a memory issue. Here’s a step-by-step guide to fix it:
- Power Down and Disconnect: Shut down your PC and unplug it from the power source.
- Reseat RAM: Remove the RAM sticks and reinstall them securely in their slots. Ensure they click into place.
- Use One RAM Stick: If you have multiple RAM sticks, try booting with just one stick in different slots to identify a faulty stick or slot.
- Check RAM Compatibility: Ensure the RAM sticks are compatible with your motherboard in terms of speed, size, and type.
- Clear CMOS: Reset the BIOS by removing the CMOS battery for a few minutes or using the motherboard’s clear CMOS button.
- Inspect for Damage: Check the RAM sticks and slots for any visible damage or debris.
- Try Different RAM: If possible, test with a different set of known-working RAM sticks to rule out defective memory.
- Check CPU Seating: An improperly seated CPU can sometimes cause RAM issues. Reseat the CPU if needed.
- Update BIOS: If you can access the BIOS after troubleshooting, update it to ensure better RAM compatibility.
If the DRAM LED still lights up after these steps, you might be dealing with a faulty motherboard or RAM module.
Different DRAM Light Colors
The color of the DRAM light on a motherboard can vary depending on the model and brand. These colors provide diagnostic information about the system’s memory (RAM). Here’s a general guide to the different colors and what they may indicate:
-
Red DRAM Light:
- Common on most motherboards (like ASUS, MSI).
- Indicates a serious RAM issue, such as improper installation, defective RAM, or incompatibility.
-
Orange/Amber DRAM Light:
- Often seen on ASUS motherboards.
- Usually signifies a memory initialization problem. It can sometimes mean the system is trying to stabilize the RAM and may resolve itself after a few reboots.
-
Yellow DRAM Light:
- Some boards use yellow to indicate a memory issue, though it can also mean the RAM is being checked by the system.
-
Flashing DRAM Light:
- A flashing DRAM light typically shows that the system is attempting to train the memory (calibrate timings and voltage).
- If it keeps flashing, it may indicate instability or failure in memory training.
To understand the exact meaning of your motherboard’s DRAM light colors, it’s always best to refer to the user manual.

Stuck on dram led nothing is fixing it
If you’re stuck with the DRAM LED lit and none of the common troubleshooting steps are fixing it, here are some more advanced solutions to try:
1. Double-Check RAM Compatibility
- Revisit the motherboard’s QVL (Qualified Vendor List) to ensure your RAM is fully supported. Even if the RAM is compatible on paper, the QVL will tell you if that specific model has been tested.
2. Try Different RAM
- Test with different RAM sticks if possible (known to be working), preferably from another brand or with different specs (speed, size).
3. Inspect CPU Pins
- An improperly seated CPU or bent pins in the CPU socket can cause memory issues. Remove the CPU, inspect for bent pins, and reseat it carefully.
4. Increase DRAM Voltage
- If your RAM is high-performance or overclocked, it may require more voltage. Try manually increasing the DRAM voltage in the BIOS (if you can access it). Use a small increment like 0.05V above the default.
5. Boot With No Peripherals
- Disconnect all peripherals, drives, and additional components except for the CPU, one RAM stick, and the GPU (if no integrated graphics). This eliminates other potential causes.
6. Test Different Slots
- If you’ve only been testing one or two slots, try others. Sometimes the memory controller can fail on just one or two slots, and working slots can still be available.
7. Update BIOS (if possible)
- If you can get into BIOS or have access to a second computer, try using a BIOS update feature (e.g., BIOS Flashback on some ASUS boards) to ensure your motherboard is running the latest version with improved memory compatibility.
8. Test Power Supply
- Ensure your power supply (PSU) is functioning properly and delivering stable power. If possible, try a different PSU to rule out power delivery issues affecting the RAM.
9. Check for Short Circuits
- Remove the motherboard from the case and place it on a non-conductive surface (e.g., cardboard) to check for potential short circuits from the case or standoffs.
10. Contact Manufacturer or RMA
- If none of the above resolves the issue, it’s likely a hardware fault. Contact the motherboard or RAM manufacturer for support, or consider sending the faulty component for RMA (Return Merchandise Authorization).
These steps should help you narrow down or solve the issue. If you still encounter the problem, it could point to a hardware defect.
FAQs
What does the DRAM light mean on my MSI motherboard?
The DRAM light on an MSI motherboard indicates a memory issue, such as improper installation or incompatible RAM.
How do I know if my RAM is faulty?
You can test for faulty RAM by booting with one stick at a time or using a memory diagnostic tool like MemTest86.
Can BIOS settings cause the DRAM light to appear?
Yes, incorrect memory configurations in the BIOS can trigger the DRAM light. Resetting the BIOS to default settings often helps.
How do I reset the CMOS battery on my motherboard?
Turn off the PC, unplug it, and remove the CMOS battery for a few minutes before reinserting it to reset the BIOS.
What should I do if the DRAM light stays on after trying all solutions?
If the issue persists, try swapping the PSU, testing with different RAM, or checking the motherboard for physical damage.
Why is my DRAM light on my motherboard?
The DRAM light on your motherboard indicates a problem with your RAM, such as improper seating, faulty memory sticks, compatibility issues, or potential damage to the motherboard or CPU.
What does DRAM mean on a motherboard?
DRAM on a motherboard refers to “Dynamic Random Access Memory,” the main memory used by the system. The DRAM light signals issues with the memory, such as seating or compatibility problems.
How long should DRAM light be on?
The DRAM light should only be on briefly during the boot process. If it stays on continuously, it indicates a problem with the RAM, such as improper installation or a hardware issue.
How do I fix my DRAM debug light?
To fix the DRAM debug light, reseat the RAM, try different slots or sticks, clear the CMOS, check for CPU issues, and ensure RAM compatibility with your motherboard.
DRAM light on motherboard orange?
An orange DRAM light on the motherboard typically indicates a memory initialization problem. It may suggest a RAM compatibility issue, improper seating, or that the system is trying to stabilize the RAM.
DRAM light on motherboard no display?
If the DRAM light on the motherboard is on and there’s no display, it usually indicates a RAM issue, such as improper installation, faulty RAM, or compatibility problems with the motherboard.
DRAM light on motherboard red?
A red DRAM light on the motherboard indicates a serious memory issue, often due to improper installation, defective RAM, or compatibility problems. It prevents the system from completing the boot process.
DRAM light on motherboard MSI?
The DRAM light on MSI motherboards indicates a memory issue. A lit light suggests improper RAM installation, faulty memory, or compatibility problems, preventing the system from booting successfully.
How to fix dram light on motherboard?
To fix the DRAM light on the motherboard, reseat the RAM, try different slots, clear the CMOS, check for compatibility issues, and ensure the CPU is properly installed.
DRAM light on motherboard ASUS?
On ASUS motherboards, the DRAM light indicates a memory issue. A lit DRAM light suggests problems like improper RAM installation, faulty modules, or compatibility issues, hindering the system’s boot process.
DRAM light on motherboard white?
A white DRAM light on a motherboard typically signifies normal operation. It may indicate that the system is checking the memory or that it has successfully initialized the RAM.
Dram light on motherboard reddit?
On Reddit, users discuss the DRAM light on motherboards as an indicator of memory issues. Common solutions include reseating RAM, testing different sticks, and checking compatibility or BIOS settings for resolution.
Conclusion
A DRAM light on your motherboard isn’t the end of the world! With a little patience and some basic troubleshooting, you can easily identify and fix the issue. Always double-check your installation, use compatible hardware, and keep your BIOS updated to prevent similar problems in the future.
Leave a Reply