When I used my Gigabyte B650 Gaming motherboard, I wanted to boot from a USB drive for installing an operating system. It wasn’t hard after I learned the correct BIOS settings. Once set up, everything worked smoothly, and now I always use this method for quick installations.
To boot from a USB on the Gigabyte B650 Gaming motherboard, enter the BIOS, set the USB drive as the primary boot device, and save the changes. This allows for quick and easy installation of operating systems or recovery tools directly from the USB.
In this article, we will discuss how to boot from a USB on the Gigabyte B650 Gaming motherboard, the steps to configure the BIOS settings, and tips for using USB drives to install operating systems or run recovery tools.
Why Boot from USB?
There are various reasons you might choose to start your system using a USB drive. Whether you’re updating your operating system, running diagnostics, or fixing a corrupted system, USB booting offers flexibility and convenience. Plus, with USB drives being portable and easy to use, they’ve become the go-to method for many users.
Overview of the Gigabyte B650 Gaming Motherboard
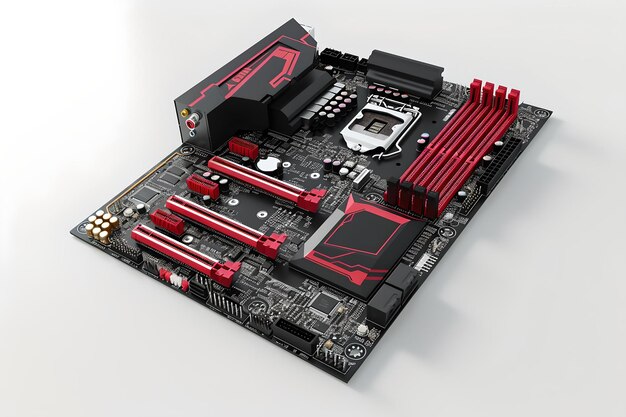
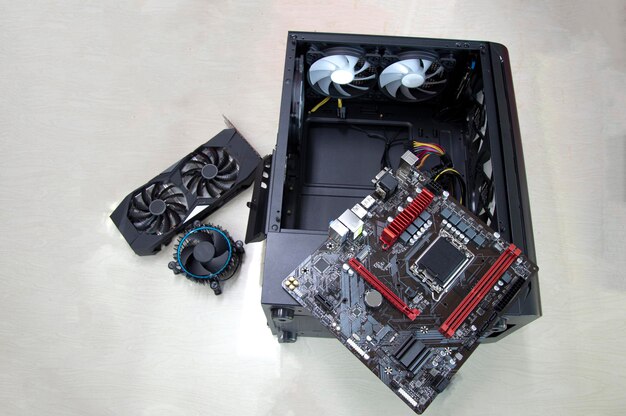
The Gigabyte B650 Gaming motherboard is packed with high-performance features designed for gamers and power users. With support for the latest AMD Ryzen processors, multiple M.2 slots, and advanced thermal management, this motherboard is ideal for those who need speed and efficiency. One key feature is its easy-to-use BIOS interface, which makes booting from USB simple.
Prerequisites Before Booting from USB
Before you dive into booting from a USB drive, you’ll need a few things prepared:
- A working USB drive with your preferred bootable content (e.g., OS installer).
- A computer with the Gigabyte B650 Gaming motherboard.
- Access to the BIOS.
USB Drive Preparation
Make sure your USB drive is formatted properly and contains the necessary files for booting, whether it’s an OS or recovery tool. The formatting should ideally be FAT32 for better compatibility.
BIOS Access Requirements
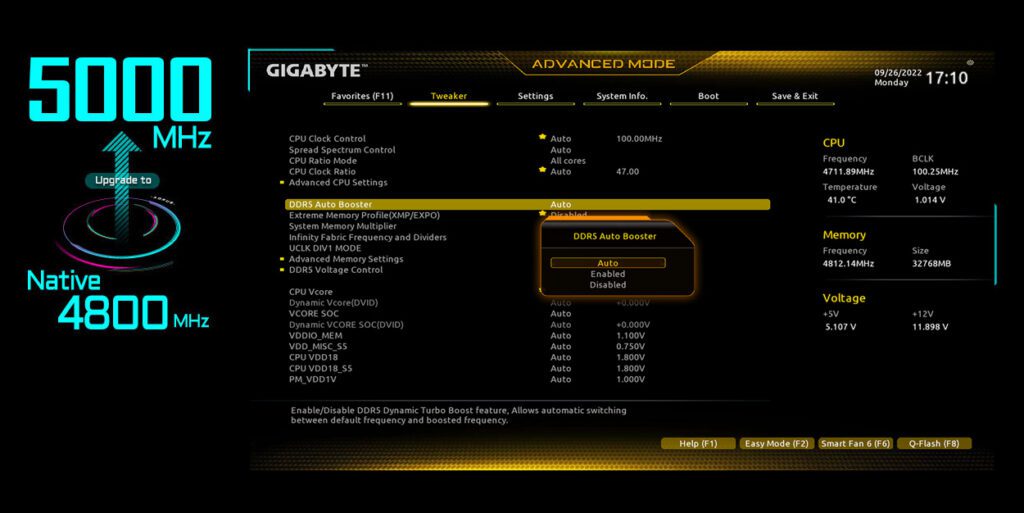
You’ll need to access your motherboard’s BIOS to change the boot settings. This typically requires pressing a specific key during startup (usually DEL or F2 on Gigabyte boards).
Step-by-Step Guide to Boot from USB
Here’s how to boot from a USB on your Gigabyte B650 Gaming motherboard:
- Insert your USB drive into the appropriate port.
- Turn on your PC and immediately press DEL to access the BIOS.
- In the BIOS menu, navigate to the “Boot” section.
- Change the boot order so that your USB drive is the primary boot device.
- Save and exit the BIOS. Your PC should now boot from the USB.

Accessing the BIOS Settings on Gigabyte B650
To access the BIOS on your Gigabyte B650, restart your system and press the DEL key repeatedly as soon as the Gigabyte logo appears. This action will open the BIOS configuration menu.
Changing Boot Order in the BIOS
Once inside the BIOS, head to the Boot tab. You’ll see a list of devices.Utilize the arrow keys to position the USB drive at the top of the list.Press F10 to save and exit.
Why Boot Order Matters
Boot order dictates which device the computer checks first for bootable content. If your USB isn’t set as the first option, the system may bypass it and boot from the hard drive instead.
Choosing the Correct USB Format
Ensure that your USB drive is formatted correctly. For older systems or simpler tasks, FAT32 is the better option. For newer systems and larger files, NTFS might be required.
Using UEFI vs. Legacy Boot
Your Gigabyte B650 supports both UEFI and Legacy boot modes. UEFI offers faster boot times and improved security, but some older systems may still need Legacy boot mode for compatibility.
Troubleshooting Common USB Boot Issues
USB Not Recognized
If your USB drive isn’t being detected, try switching it to another port, especially one directly connected to the motherboard.
Boot Loop Issues
If your system keeps booting into the BIOS, ensure the USB drive is correctly formatted and bootable.
BIOS Updates for the Gigabyte B650
Updating the BIOS can resolve some boot issues. To do this, download the latest BIOS version from Gigabyte’s official website and follow the instructions for updating.
Security Settings Affecting USB Boot
If you’re unable to boot from USB, it could be due to Secure Boot being enabled. To fix this, navigate to the BIOS security settings and disable Secure Boot.
Advanced BIOS Features for Custom Boot Options
Gigabyte’s BIOS offers advanced features like boot override, allowing you to boot from a device once without changing the boot order permanently.
Restoring Default BIOS Settings if Something Goes Wrong
If your system isn’t booting properly, you can restore the default settings by selecting the “Load Optimized Defaults” option in the BIOS.
Gigabyte B650 GAMING X AX won’t boot to USB
If your Gigabyte B650 GAMING X AX motherboard isn’t booting from a USB, there are several steps you can try to resolve the issue:
- Check Boot Order: Enter the BIOS by pressing Delete or F2 during startup. Go to the Boot menu and ensure the USB drive is prioritized as the first boot device.
- Disable Secure Boot: In the BIOS, navigate to the Security tab and disable Secure Boot. Sometimes this security feature blocks booting from USB.
- Enable CSM (Compatibility Support Module): Go to the BIOS Settings > Boot and enable CSM. This setting helps with compatibility for older boot methods and USBs.
- Check USB Format: Make sure the USB is formatted correctly (e.g., FAT32 for UEFI boot). If using Rufus or similar tools, ensure it’s set for GPT partition and UEFI boot mode.
- Try Different USB Ports: Use another USB port, especially if you are using a USB 3.0 port. Some systems may have issues with faster USB ports during boot.
- Update BIOS: Ensure your motherboard has the latest BIOS version. Sometimes BIOS updates fix boot issues with certain hardware configurations.
If the issue persists, you might want to verify your USB boot media or consider creating a new one with different software like Rufus or Media Creation Tool.
Gigabyte b650 DS3H secure boot won’t boot from USB
If your Gigabyte B650 DS3H won’t boot from USB due to Secure Boot, follow these steps to resolve the issue:
- Disable Secure Boot:
- Enter the BIOS by pressing Delete during startup.
- Go to Settings > Miscellaneous > Secure Boot and set Secure Boot to Disabled.
- Save changes and exit the BIOS.
- Enable CSM (Compatibility Support Module):
- In BIOS, go to BIOS Settings > Boot.
- Enable CSM to allow legacy boot modes.
- Ensure USB is Bootable:
- Make sure your USB drive is correctly formatted for UEFI (use FAT32).
- If you’re creating bootable media, use tools like Rufus and set the partition scheme to GPT for UEFI.
- Adjust Boot Order:
- Set your USB drive as the primary boot device in the Boot menu.
These steps should allow your system to boot from the USB while dealing with Secure Boot settings
Why can’t I boot by USB on my Gigabyte motherboard?
If you can’t boot by USB on your Gigabyte motherboard, it could be due to several reasons:
- Secure Boot Enabled: Secure Boot may be blocking booting from non-authorized devices like USB drives. You need to disable Secure Boot in the BIOS.
- Incorrect Boot Mode (UEFI vs Legacy): The USB might be formatted for the wrong boot mode. Ensure your BIOS is set to match the USB format:
- For UEFI boot, the USB should be formatted with a GPT partition scheme and FAT32.
- For Legacy boot, the USB should use MBR and NTFS.
- Boot Order: The USB device may not be set as the first boot priority. Enter the BIOS and ensure the USB is selected as the primary boot device.
- Faulty USB or Port: The USB drive itself could be corrupt, or the port might not be functioning properly. Try recreating the bootable USB or switching to a different port.
- CSM (Compatibility Support Module): Some motherboards require CSM to be enabled for booting from legacy devices. You can enable CSM in the BIOS settings.
- USB Format: If the USB is not bootable (improperly created or wrong format), use a tool like Rufus to reformat it with the correct partition scheme and file system for UEFI or legacy mode.
These steps should help resolve most booting issues on Gigabyte motherboards. If issues persist, try updating your BIOS to the latest version.

B650 PRO-P will not boot
If your MSI B650 PRO-P motherboard won’t boot, there are several potential causes and troubleshooting steps to resolve the issue:
1. Check Power Supply
- Ensure that the 24-pin ATX power and the 8-pin CPU power connectors are securely plugged in.
- Check to ensure that the power supply unit (PSU) is operating properly.
2. BIOS/POST Troubles
- Check the Debug LEDs: Many MSI boards have debug LEDs that indicate issues with CPU, DRAM, VGA, or boot devices. Check which LED stays on during boot and troubleshoot accordingly:
- CPU: Ensure the CPU is seated correctly and check for bent pins.
- DRAM: Reseat or try different RAM sticks and slots.
- VGA: If you have a dedicated GPU, make sure it’s seated properly. For systems without a GPU, ensure the CPU has integrated graphics.
- Clear CMOS: Resetting the BIOS might help. You can do this by either shorting the clear CMOS jumper or removing the CMOS battery for a few minutes.
3. Check RAM Configuration
- Make sure the RAM is properly installed in the correct slots. For dual-channel operation, the modules should be placed in the recommended slots (usually slots 2 and 4).
- Try booting with just one stick of RAM to rule out a faulty module.
4. BIOS Update
- The board might require a BIOS update for newer CPUs (if your CPU is newer than the motherboard’s initial release). Use the Flash BIOS button on your MSI B650 PRO-P if it supports the feature, even without a CPU installed.
5. Peripheral Devices
- Disconnect unnecessary devices such as external drives, USB peripherals, or any other connected devices to see if they are causing boot issues.
6. Graphics Card
- If using a dedicated GPU, check that it’s properly seated in the PCIe slot and has the necessary power connections. Try booting with onboard graphics (if available) by removing the GPU.
7. Inspect USB Drives/Boot Media
- If you’re trying to boot from a USB drive, verify that it’s properly formatted and bootable. Double-check the boot order in BIOS and make sure UEFI/CSM settings align with the USB configuration.
If the system still doesn’t boot, you may need to contact MSI support or consult the motherboard’s user manual for specific troubleshooting guidance.
FAQs
How do I boot from USB on the Gigabyte B650?
Access the BIOS, set the USB drive as the primary boot device, and save the settings.
What format should my USB be in?
FAT32 is recommended for compatibility, but NTFS can be used for larger files.
Why is my USB drive not recognized?
Try switching to a different USB port or reformatting the drive to ensure it’s bootable.
How can I update the BIOS on my Gigabyte B650?
Download the latest BIOS version from Gigabyte’s website and follow the update instructions.
What is the difference between UEFI and Legacy boot?
UEFI offers faster boot times and better security, while Legacy mode is used for older systems.
How do I enable USB boot in BIOS Gigabyte?
To enable USB boot on a Gigabyte motherboard, enter BIOS, set USB as the primary boot device, disable Secure Boot (if needed), and enable CSM for legacy boot. Save and exit.
How to flash BIOS from USB gigabyte motherboard?
To flash BIOS on a Gigabyte motherboard, download the latest BIOS, copy it to a FAT32 USB, enter BIOS, use Q-Flash to select the file, and complete the update.
How to boot from USB with UEFI BIOS?
To boot from USB in UEFI BIOS, insert the USB, enter BIOS, set USB as the primary boot device, disable Secure Boot (if needed), then save and exit to boot from the USB.
How to flash BIOS Gigabyte B650?
To flash the BIOS on a Gigabyte B650 motherboard, download the latest BIOS from the Gigabyte website, copy it to a FAT32 USB, enter BIOS, use Q-Flash, and select the BIOS file.
Do you need to Flash a B650?
Flashing the BIOS on a B650 motherboard is beneficial for new CPU support, bug fixes, and feature enhancements. It’s not always necessary unless you encounter specific issues or plan significant upgrades.
How to flashback BIOS from USB?
To flashback the BIOS from USB on a Gigabyte motherboard, format the USB to FAT32, download and rename the BIOS file to GIGABYTE.bin, insert the USB, press the Q-Flash button, and wait for completion.
Conclusion
Booting from a USB drive on the Gigabyte B650 Gaming motherboard is a straightforward process once you understand the steps. With its easy-to-navigate BIOS and high performance, this motherboard makes USB booting efficient for tasks like OS installations and troubleshooting.

Leave a Reply